The iPhone 13 makes it easy to scan documents using the built-in camera app. Here’s how to do it:
Step 1: Open the Notes app
The first step is to open the Notes app on your iPhone 13.
Step 2: Create a new note
Next, create a new note by tapping on the compose icon (the square with a pencil inside) at the bottom right corner of the screen.
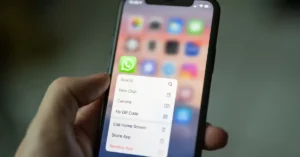
Step 3: Tap on the camera icon
Once you’ve created a new note, tap on the camera icon at the bottom of the screen. This will open a menu of options, including “Scan Documents”.
Step 4: Select “Scan Documents”
Tap on “Scan Documents” to open the camera app.
Step 5: Position the document
Position the document you want to scan in the viewfinder. The camera app will automatically detect the edges of the document and adjust the focus.
Step 6: Adjust the corners
If necessary, adjust the corners of the document by dragging them with your finger. This will ensure that the document is aligned and centered.
Step 7: Save the scan
Once you’re happy with the scan, tap on “Keep Scan” to save it. You can then add it to your note by tapping on “Save to Note”.
That’s it! You have successfully scanned a document on your iPhone 13.
Scanning documents with the iPhone 13 is a great way to quickly digitize physical documents and store them on your device. Whether you’re scanning receipts, contracts, or handwritten notes, the process is quick and easy.
So next time you need to scan a document, don’t hesitate to use your iPhone 13!
- SEO Powered Content & PR Distribution. Get Amplified Today.
- Platoblockchain. Web3 Metaverse Intelligence. Knowledge Amplified. Access Here.
- Source: https://www.techpluto.com/how-to-scan-on-iphone-13/
- :is
- 1
- 7
- a
- aligned
- and
- app
- At
- automatically
- Bottom
- built-in
- by
- camera
- CAN
- centered
- contracts
- Corner
- corners
- create
- created
- device
- digitize
- document
- documents
- Dont
- ensure
- finger
- First
- Focus
- great
- happy
- Have
- How
- How To
- http
- ICON
- in
- Including
- iPhone
- IT
- jpg
- MAKES
- Menu
- necessary
- Need
- New
- next
- Notes
- of
- on
- open
- Options
- physical
- plato
- Plato Data Intelligence
- PlatoData
- position
- process
- Quick
- quickly
- receipts
- Save
- scan
- scanning
- Screen
- square
- Step
- store
- Successfully
- Tap
- that
- The
- Them
- time
- to
- use
- Way..
- whether
- will
- with
- Your
- zephyrnet