I recently had the opportunity to purchase an early version of a new display, and it happened to be just the thing I needed to make a project work. That display is the Elecrow 11.6″ CrowVision touchscreen slated for release in 2024. Preorders are being accepted on Crowd Supply.
I had an idea for a retro-inspired PC build that was just waiting for a screen like this. I’ll talk about the display and what’s good about it, then showcase the build for which it was the missing piece. If you’ve got a project waiting for something similar, maybe this part will provide what you need or at least turn on some new ideas.
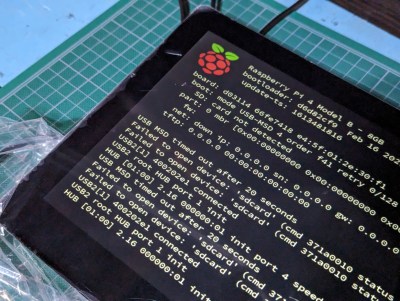 The CrowVision 11.6″ 1366 x 768 touchscreen has an HDMI input, USB output for touch data, and accepts 12 V DC. It’s made to interface easily with a Raspberry Pi or other SBC (single-board computer).
Personally I consider a display like this to be the minimum comfortable size for using desktop type applications in a windowed environment. Most displays in this space are smaller. But aside from that, what helps make it useful for embedding into a custom enclosure is the physical layout and design.
Since I was looking for the largest display that could be flush-mounted in an enclosure without a lot of extra space around the display’s sides, it was just what I needed. The integrated touchscreen is a nice bonus.
Apart from its size, there are a few features that helped make my project a bit easier than it otherwise would have been.
The flat, borderless black front of the display allows for easy flush mounting. It’s also trivial to design for enclosure-wise. There’s an adhesive, but for truly secure mounting there are four threaded holes in the metal shield at the back.
The display is physically very close to being the same width as the Raspberry Pi 400 (or the official Raspberry Pi keyboard), which was good news for the overall layout of my retro build. It was important for the look of my machine for the keyboard and display to have matching widths.

The driver board is secured to the rear shield of the display, well away from the display edges. This helps keep connectors and cables from sprawling outward and bloating the part’s footprint, making mounting in snug spaces easier.
Another handy feature is the included mounting solution for a variety of different single-board computers. Mounting posts slide in two channels, accommodating multiple form factors. Having an SBC like a Raspberry Pi attached directly to the display’s back is extremely handy for tight builds and makes cable management easier.
Finally, the display accepts 12 V and can pass 5 V power to a board like a Raspberry Pi, eliminating the need for a second power supply just for the SBC. The display’s built-in power button — mounted on the rear, and can be expanded out via an included extension — controls power for both the display and any attached SBC.
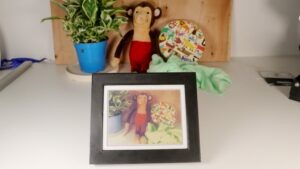
The display worked perfectly when connected to a Raspberry Pi. The multitouch input, a USB connection from the display to the Pi, also worked effortlessly. I verified multitouch worked properly with this web-based multitouch tester.

Celestia is my retro styled PC designed to use a Raspberry Pi — either a Raspberry Pi 400 or a Raspberry Pi SBC plus an official Raspberry Pi keyboard — in a one-piece form factor.
A 3D-printable enclosure accommodates the CrowVision 11.6″ display, the only display option that really matched what I was going for. Since the display integrates a touchscreen, a mouse is easy to do without, helping preserve the one-piece aesthetic.
The back of the enclosure has spaces for integrating a power jack and a small USB hub for convenience, but for those who would like to remix the design and create their own ports, the CAD file includes a blank segment with no openings.
The result is a one-piece unit with some real retro aesthetics. It’s exactly what I wanted ever since coming across another retro PC project: the Callisto-2.
The design files for Celestia are hepsi GitHub'da, and while it’s a bit of a work in progress, the important parts are all there along with some tips for printing, finishing, and assembly.
A Few Words About The Keyboard
Celestia integrates a Raspberry Pi official keyboard into the 3D-printed case. But the Raspberry Pi 400 has a virtually identical form factor, and includes a computer. That means one can either attach an SBC to the display’s back using the mounting posts, or simply plug it all in to a Pi 400. It will look the same from the outside.
Both the official Raspberry Pi keyboard and the Pi 400 have matte white finishes that blend in very well if the enclosure is printed in a matte white PLA.
Dokunuşlar tamamlanması
Completing the look for my build is a piece of software called cool retro terminal. I adjusted the taskbar at the top of the Raspberry Pi desktop to auto-hide, and run cool-retro-term in fullscreen mode. While cool-retro-term is running, a right-click will access additional configuration. (I think it looks best on this display by removing screen curvature, and eliminating margin.) The only downside is that it runs slowly on a Raspberry Pi.
Pastanın üzerindeki krema dialing up a fictional 80s supercomputer AI for a chat, something made almost trivial thanks to Max Woolf’s basitaichat yazılım.
As mentioned, this display turned out to be the missing link for the build I wanted. There are displays with similar design and features, like the Raspberry Pi official touchscreen, but most are smaller and lower resolution. Thin and flat HDMI displays sold as “portable monitors” looked initially promising, but tend to have issues like bezel design or connector locations that make them troublesome to integrate into custom enclosures.
If this display seems like the missing puzzle piece for your own project, the Elecrow 11.6″ CrowVision is slated for release in 2024, with preorders being handled via Kalabalık Arzı.
- SEO Destekli İçerik ve Halkla İlişkiler Dağıtımı. Bugün Gücünüzü Artırın.
- PlatoData.Network Dikey Üretken Yapay Zeka. Kendine güç ver. Buradan Erişin.
- PlatoAiStream. Web3 Zekası. Bilgi Genişletildi. Buradan Erişin.
- PlatoESG. karbon, temiz teknoloji, Enerji, Çevre, Güneş, Atık Yönetimi. Buradan Erişin.
- PlatoSağlık. Biyoteknoloji ve Klinik Araştırmalar Zekası. Buradan Erişin.
- Kaynak: https://hackaday.com/2023/12/11/new-part-day-flush-mount-touchscreen-for-retro-pc-build/
- :vardır
- :dır-dir
- $UP
- 1
- 11
- 12
- 2024
- 250
- 400
- a
- Hakkımızda
- hakkında
- kabul edilen
- Kabul eder
- erişim
- karşısında
- Ek
- Düzeltilmiş
- AI
- Türkiye
- veriyor
- neredeyse
- boyunca
- Ayrıca
- an
- ve
- Başka
- herhangi
- uygulamaları
- ARE
- etrafında
- AS
- bir kenara
- Montaj
- At
- iliştirmek
- Oto
- uzakta
- Arka
- BE
- olmuştur
- olmak
- İYİ
- Bit
- Siyah
- boş
- Karışım
- yazı tahtası
- Bonus
- sınırsız
- her ikisi de
- inşa etmek
- inşa
- yerleşik
- fakat
- düğmesine tıklayın
- by
- kablo
- kablolar
- CAD
- KEK
- denilen
- CAN
- dava
- kanallar
- tıklayın
- Kapanış
- rahat
- gelecek
- bilgisayar
- bilgisayarlar
- yapılandırma
- bağlı
- bağ
- Düşünmek
- kontroller
- kolaylık
- olabilir
- yaratmak
- kalabalık
- görenek
- veri
- gün
- dc
- Dizayn
- tasarlanmış
- masaüstü
- farklı
- direkt olarak
- ekran
- görüntüler
- do
- olumsuz
- sürücü
- Erken
- kolay
- kolayca
- kolay
- zahmetsizce
- ya
- ortadan
- katıştırma
- son
- büyütmek
- çevre
- Eter (ETH)
- hİÇ
- kesinlikle
- genişletilmiş
- uzatma
- ekstra
- son derece
- faktör
- faktörler
- sahte
- Özellikler(Hazırlık aşamasında)
- Özellikler
- az
- hayali
- fileto
- dosyalar
- düz
- ayak izi
- İçin
- Airdrop Formu
- dört
- itibaren
- ön
- GitHub
- gidiş
- Tercih Etmenizin
- var
- vardı
- kullanışlı
- olmuş
- Var
- sahip olan
- yardım
- yardım
- yardımcı olur
- Delikler
- HTTPS
- merkez
- i
- Ben
- Fikir
- fikirler
- özdeş
- if
- önemli
- in
- dahil
- içerir
- başlangıçta
- giriş
- entegre
- entegre
- Entegre
- Bütünleştirme
- arayüzey
- içine
- sorunlar
- IT
- ONUN
- kriko
- jpg
- sadece
- tutmak
- büyük
- Düzen
- en az
- sevmek
- LINK
- yerleri
- Bakın
- baktı
- bakıyor
- GÖRÜNÜYOR
- Çok
- alt
- makine
- yapılmış
- yapmak
- YAPAR
- Yapımı
- yönetim
- Kenar
- eşleşti
- uygun
- maksimum
- maksimum genişlik
- olabilir
- anlamına geliyor
- adı geçen
- metal
- asgari
- eksik
- Moda
- çoğu
- fare
- çoklu
- my
- gerek
- gerekli
- yeni
- haber
- güzel
- yok hayır
- of
- resmi
- on
- ONE
- bir tek
- açıklıklar
- Fırsat
- seçenek
- or
- Diğer
- aksi takdirde
- dışarı
- çıktı
- dışında
- tüm
- kendi
- Bölüm
- parçalar
- geçmek
- PC
- kusursuzca
- PHP
- fiziksel
- fiziksel olarak
- parça
- Platon
- Plato Veri Zekası
- PlatoVeri
- fiş
- artı
- portları
- Mesajlar
- güç kelimesini seçerim
- Power Supply
- baskı
- Ilerleme
- proje
- Proje
- umut verici
- uygun şekilde
- sağlamak
- satın alma
- bulmaca
- Ahududu
- Ahududu Pi
- gerçek
- Gerçekten mi
- geçenlerde
- serbest
- Remix
- kaldırma
- çözüm
- sonuç
- Retro
- Sağ tıklatın
- koşmak
- koşu
- ishal
- aynı
- SBC
- Ekran
- İkinci
- güvenli
- Secured
- görünüyor
- bölüm
- Kalkan
- kısa
- vitrin
- Yüzler
- benzer
- sadece
- beri
- beden
- slayt
- Yavaş yavaş
- küçük
- daha küçük
- Yazılım
- satılan
- çözüm
- biraz
- bir şey
- uzay
- alanlarda
- Süper bilgisayar
- arz
- Konuşmak
- eğilimindedir
- göre
- Teşekkürler
- o
- The
- ve bazı Asya
- Onları
- sonra
- Orada.
- şey
- düşünmek
- Re-Tweet
- Bu
- ipuçları
- için
- üst
- dokunma
- Dokunmatik
- gerçekten
- DÖNÜŞ
- Dönük
- iki
- tip
- türleri
- birim
- usb
- kullanım
- kullanma
- çeşitlilik
- Doğrulanmış
- versiyon
- çok
- üzerinden
- fiilen
- Bekleyen
- aranan
- oldu
- Web tabanlı
- İYİ
- Ne
- ne zaman
- hangi
- süre
- beyaz
- DSÖ
- irade
- ile
- olmadan
- sözler
- İş
- işlenmiş
- olur
- X
- sen
- zefirnet


