You can complete various Photo Rally events to earn big rewards in Like a Dragon: Infinite Wealth. They find you snapping pictures in noteworthy locations. Here is our guide listing all Uptown Photo Rally locations in Like a Dragon: Infinite Wealth.
Like a Dragon: Infinite Wealth – all Uptown Photo Rally locations
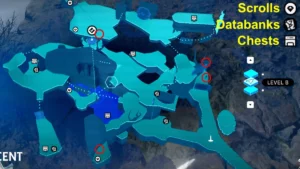
Your work on Photo Rally begins early in the campaign, in Hawaii. However, it continues once you start exploring Yokohama. There is a separate branch you should visit whenever you complete an additional tour, located south of Jinnai Station Square. Most of the tours are every bit as involved as any you completed in Hawaii. In the Uptown district, you can find 15 locations to document.
Related:All Honk-Honk locations in Like a Dragon: Infinite Wealth
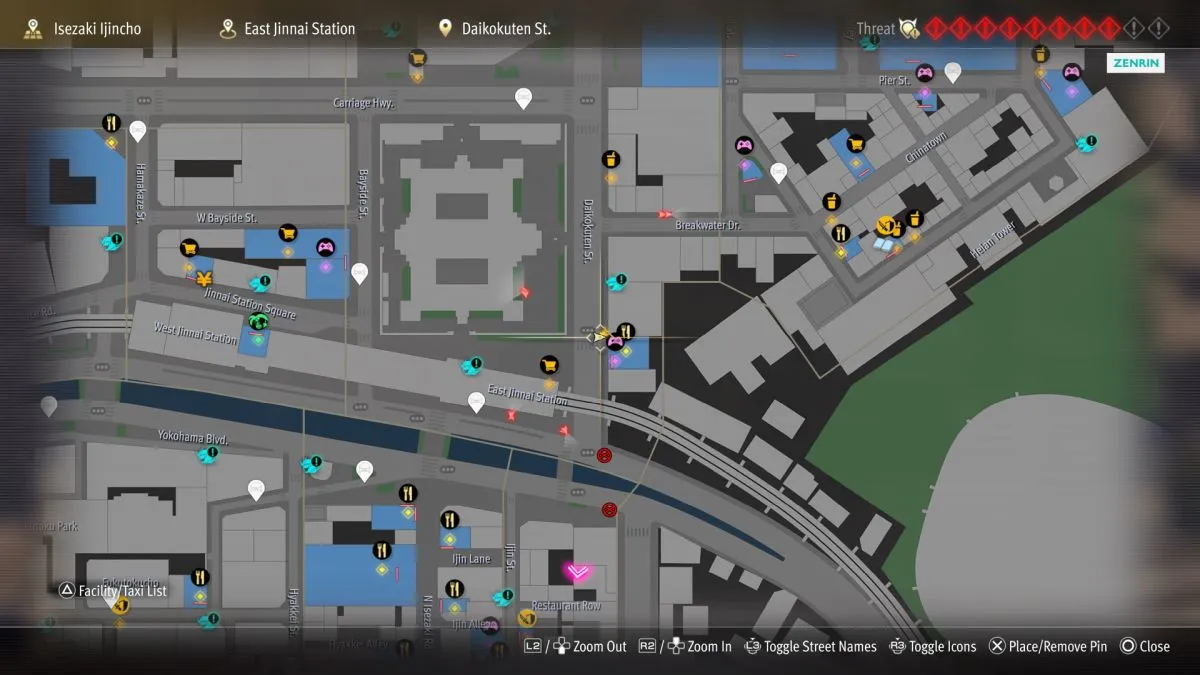
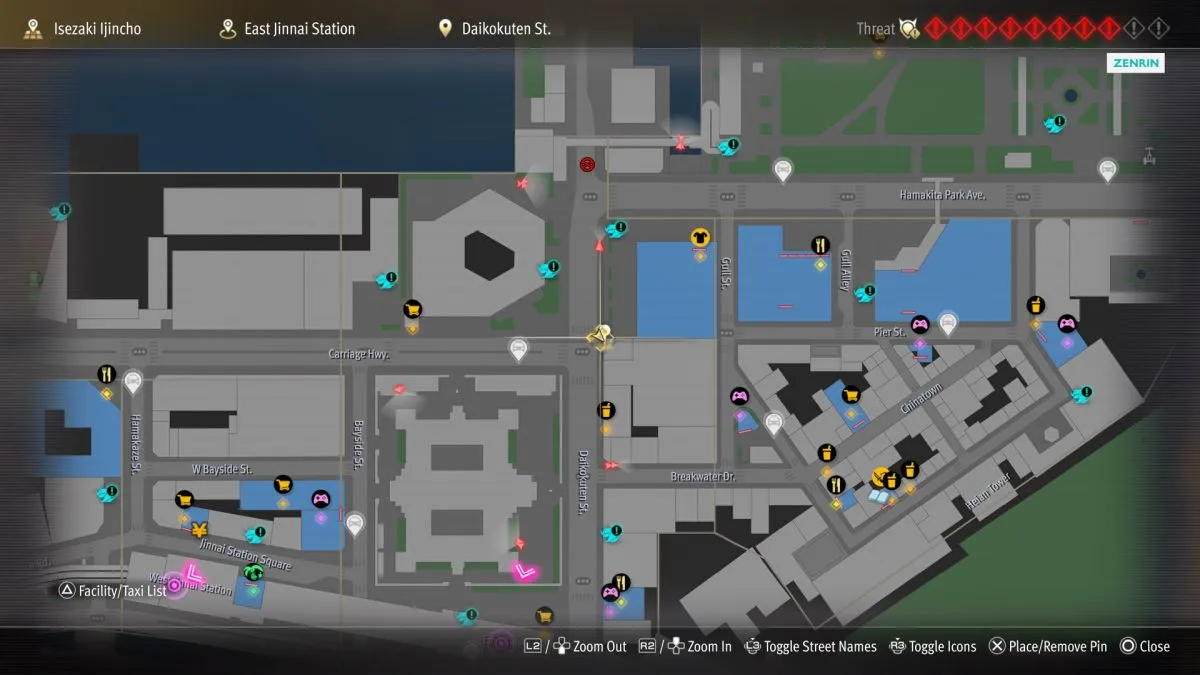
We’re listing all 15 locations below. For each location, we’ll provide brief written directions. We’re also including map screenshots, plus screenshots showing your characters standing near the target. Locations are listed in the order they are presented.
1. Seiryo High School Gates

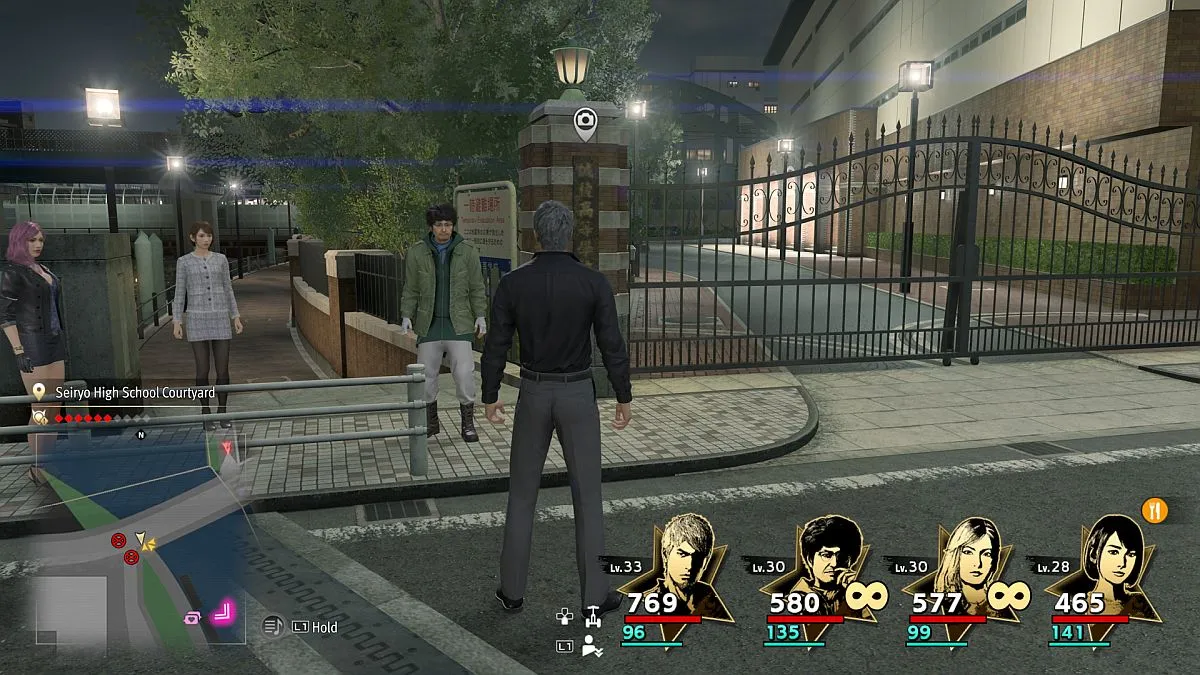
Follow Kinka St. to its far north end, where it meets with the highway. If you have it accessible, you can use the Heaven’s Golf fast travel beacon to get most of the way there. Then just continue north to the highway. From there, head southwest across the bridge, to the western edge of the map. There, you can photograph the stone column at the high school gates.
2. Heaven’s Golf
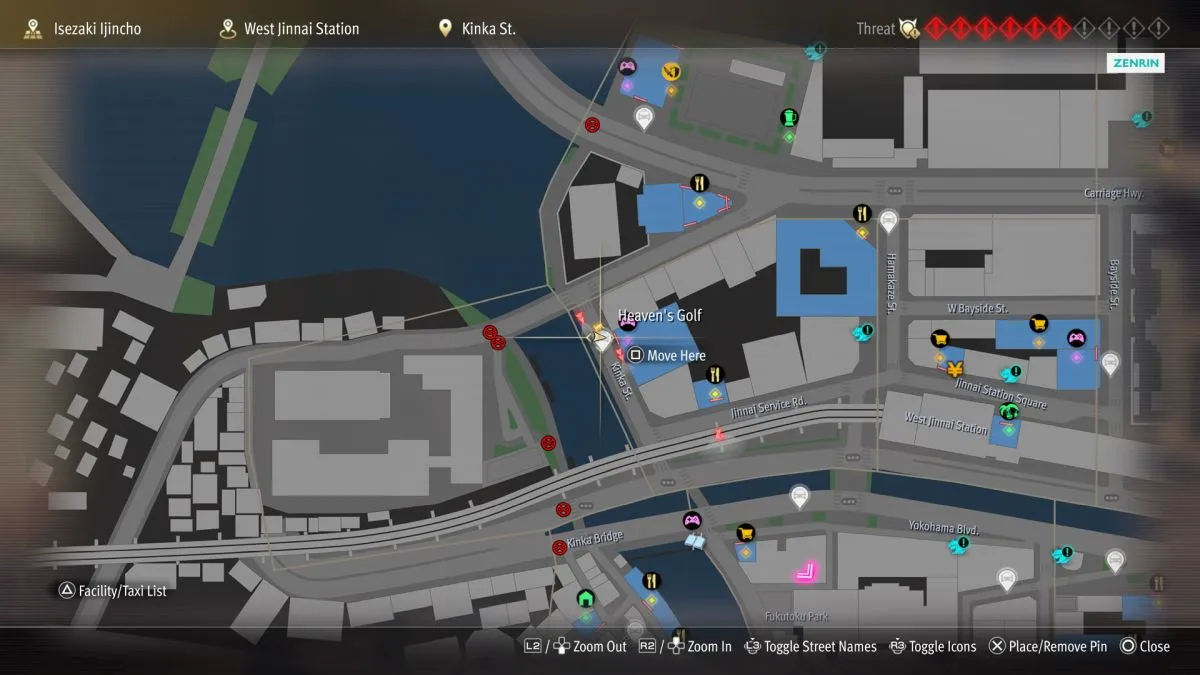

You can find this along Kinka St. near the map’s west edge. There is a fast travel beacon to activate. Take a picture of the big sign with a golfing silhouette that hangs over the building’s front entry.
3. 5-6 Motorcycles
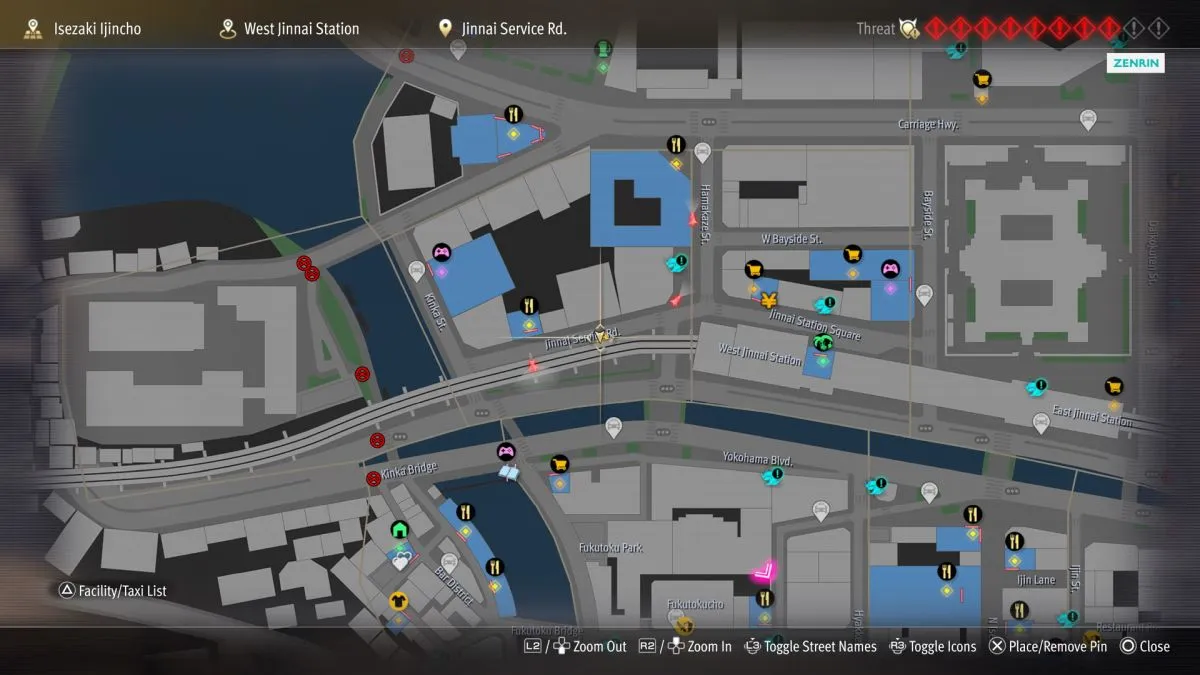

Your destination is on the Jinnai Service Rd. near the Kappo Katsumi restaurant. You can get there a few ways. I like to use the Heaven’s Golf fast travel beacon and head south on Kinka St. before veering left on the service road. Then, the 5-6 Motorcycles business you need to photograph is on the right. One word of warning: in this area, a speeding car comes along. Dangerous enemies ride in the vehicle. Make sure to keep your distance.
4. Jinnai Station
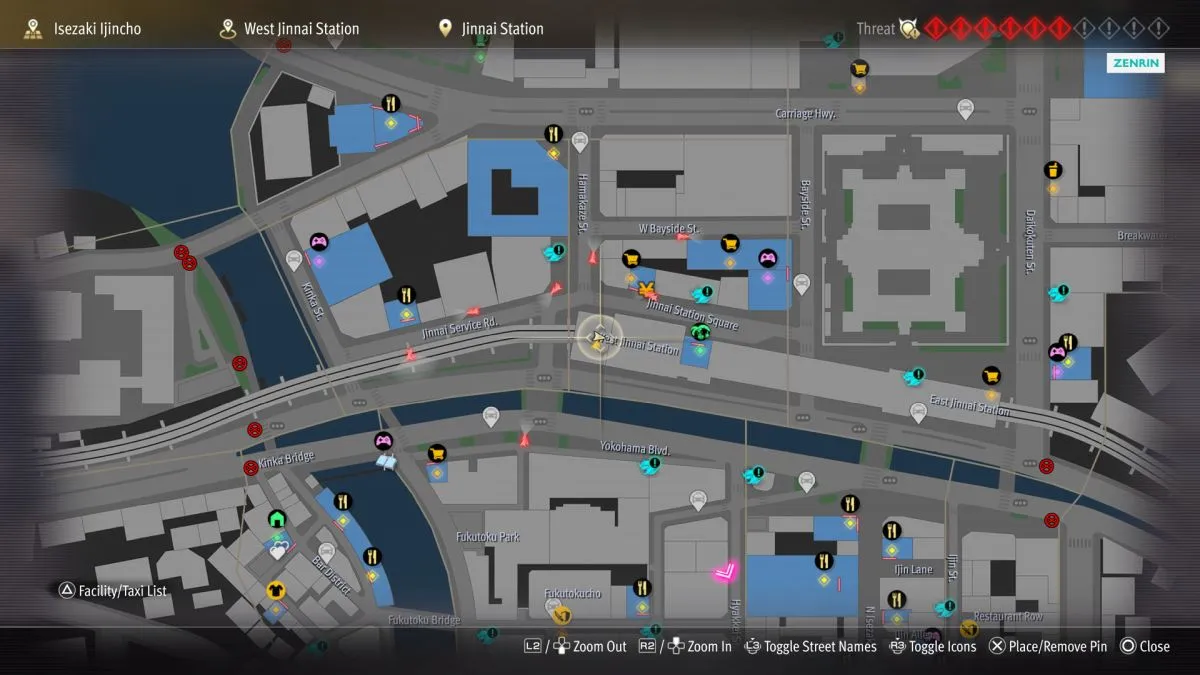
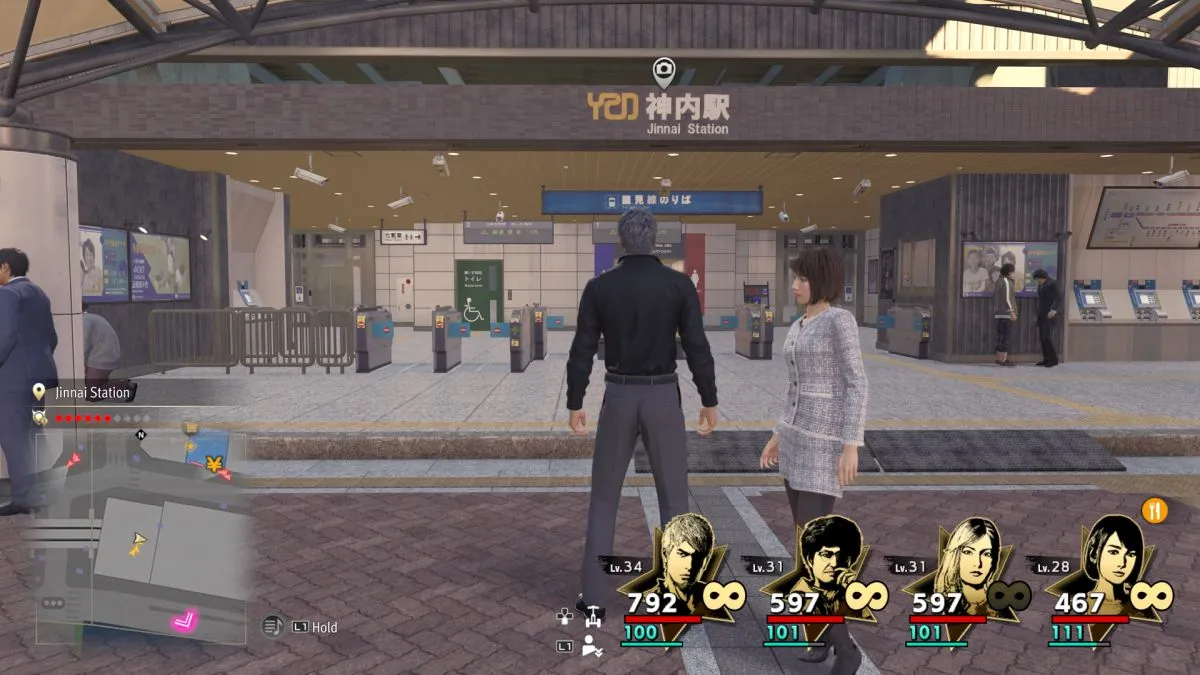
This photo should be taken within the area on the map that is labeled West Jinnai Station. The nearest fast travel location is Yokohama Blvd. Residential District across the highway to the southwest. Fast travel to that beacon. Then head northeat toward the Jinnai Station Square. On the way, you’ll find the west part of the station is a covered area with a plaza. Look along the east side of the plaza to see the concrete beam you need to photograph.
5. Alo-Happy Yokohama
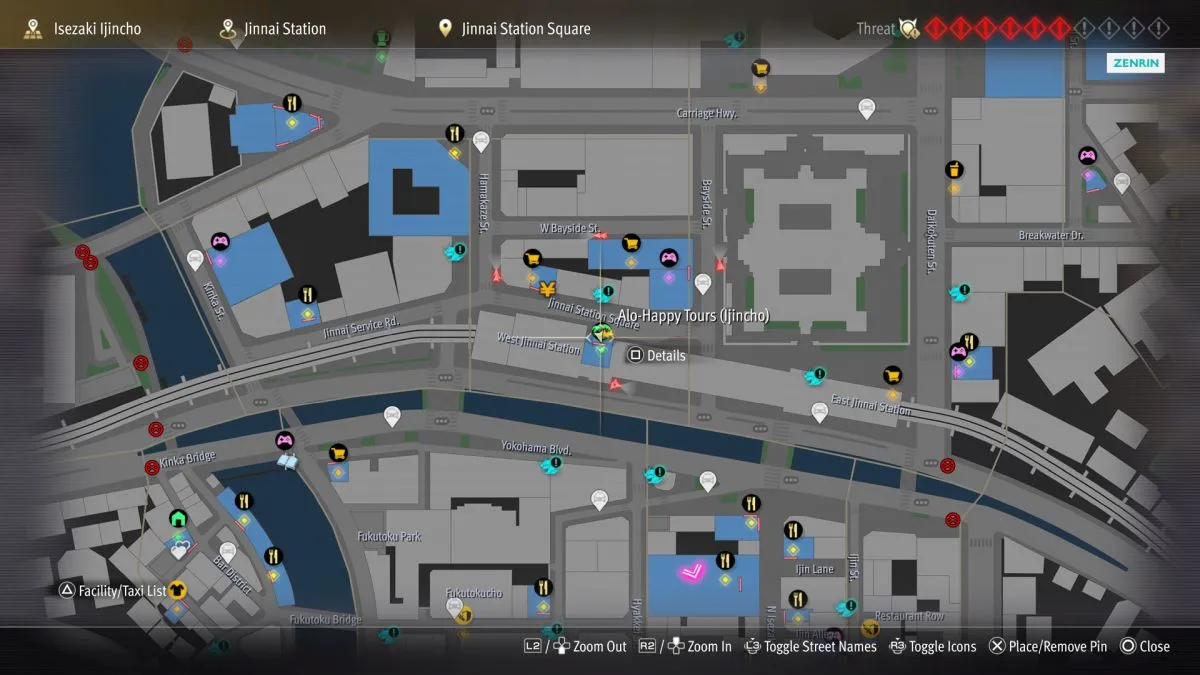
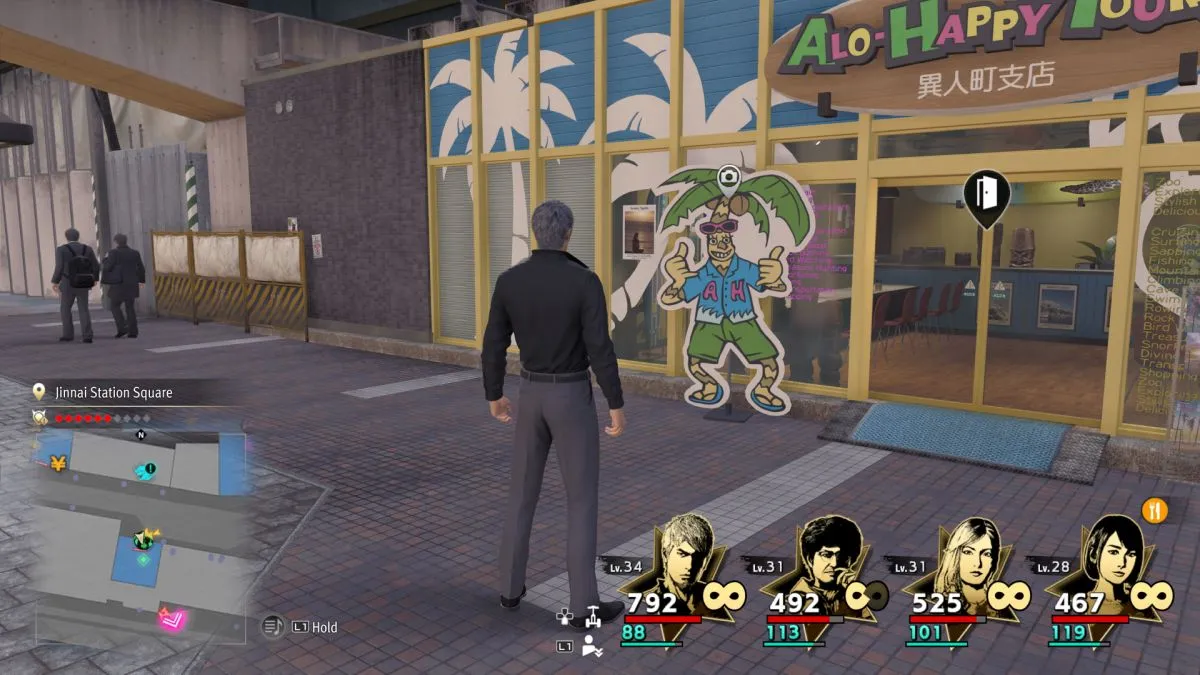
When you first find Alo-Happy in Yokohama, labeled on the map as Alo-Happy Tours (Ijincho), you’re at the building you need to photograph. It is located along the south side of Jinnai Station Square. Just take a picture of the mascot outside the front entrance.
6. The Bee
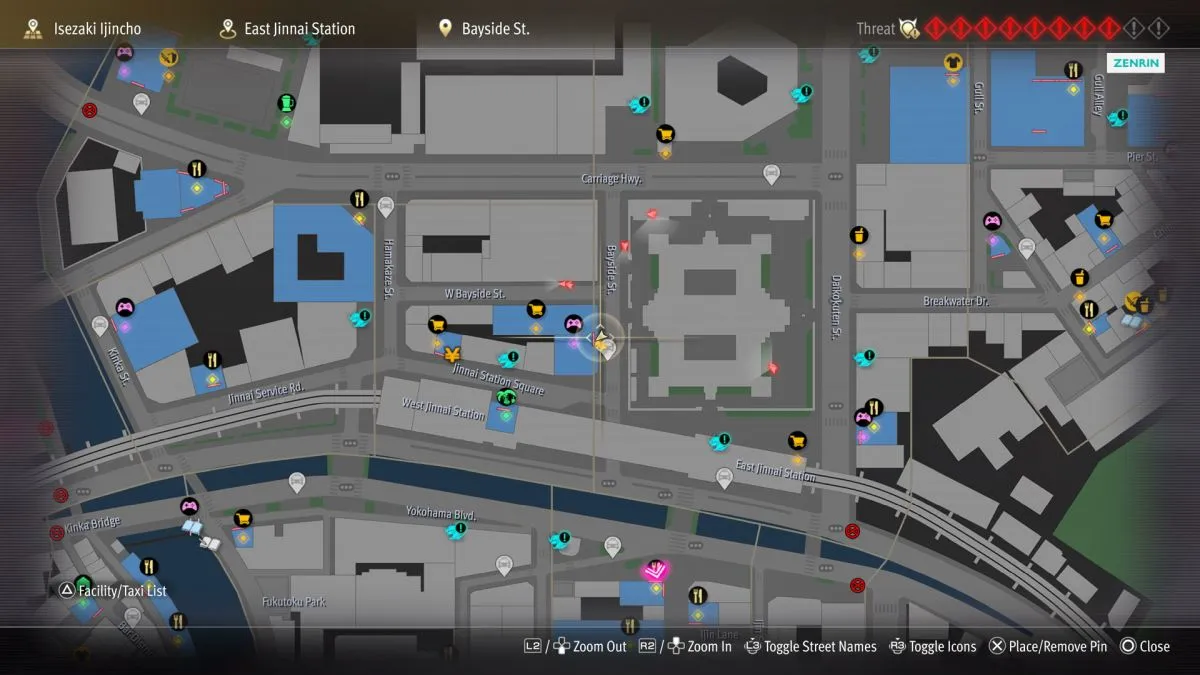

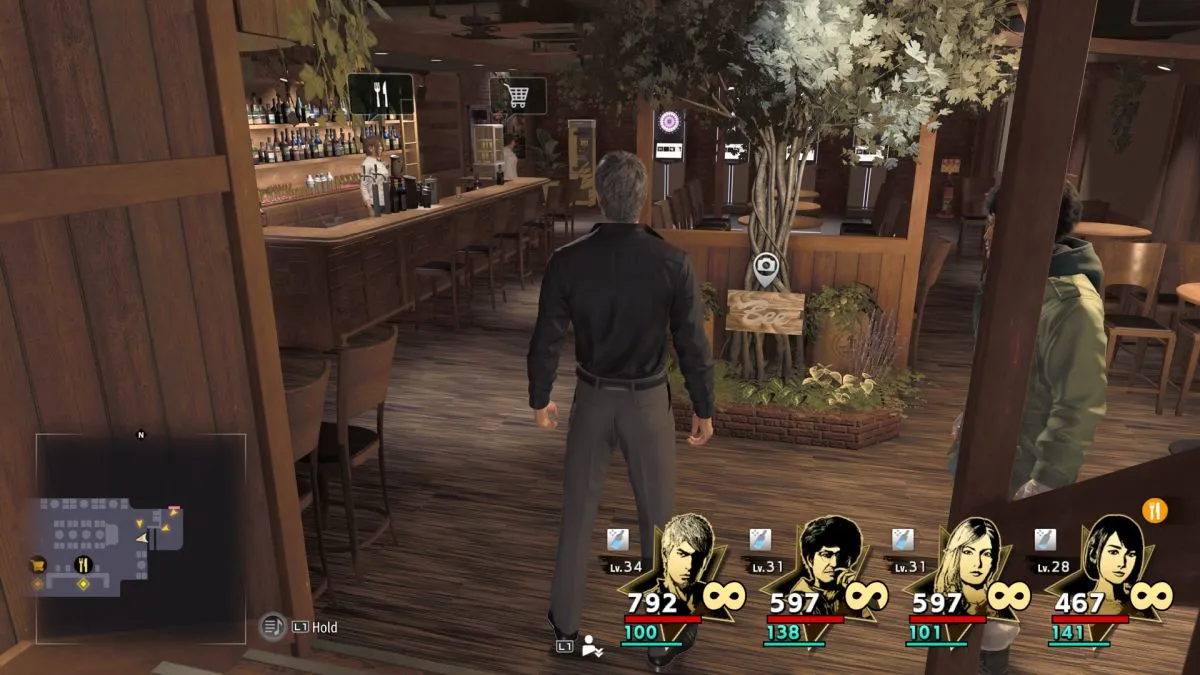
You have to go inside a business to take this picture. You can enter The Bee not far northeast of Alo-Happy Tours (Injincho). You may even have accessed a fast travel beacon to take you directly there. The establishment is located near the southern half of Bayside St. on its west side. Simply enter the front door and head down the steps. Take a turn at the base of the stairs to access the main room. You want to photograph the sign directly ahead of you.
7. Shark Stars
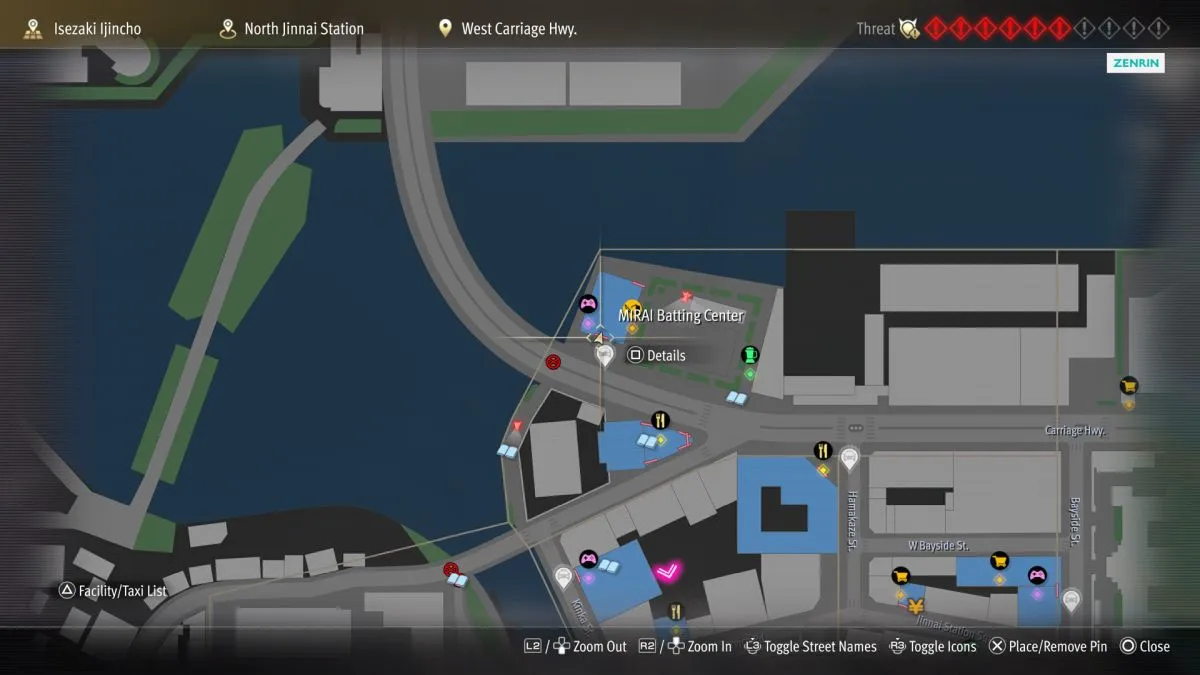
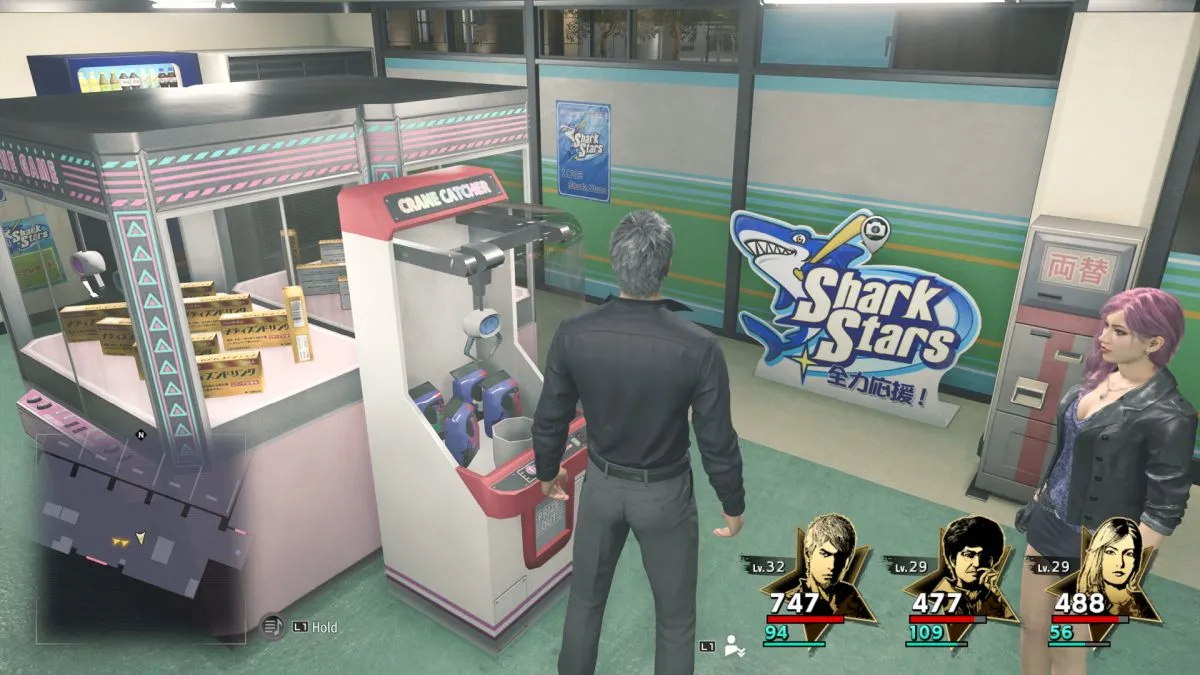
Take this photo inside the Batting Center. The building is located at the very northwest side of the map, and you visit it not long after you reach Chapter 8. There is a Batting Center fast travel beacon you can use to easily return. Once you do, look back toward the front door you used to enter the building. To its right, you’ll see a cardboard standee you should photograph.
8. Jinnai Bronze Hotel
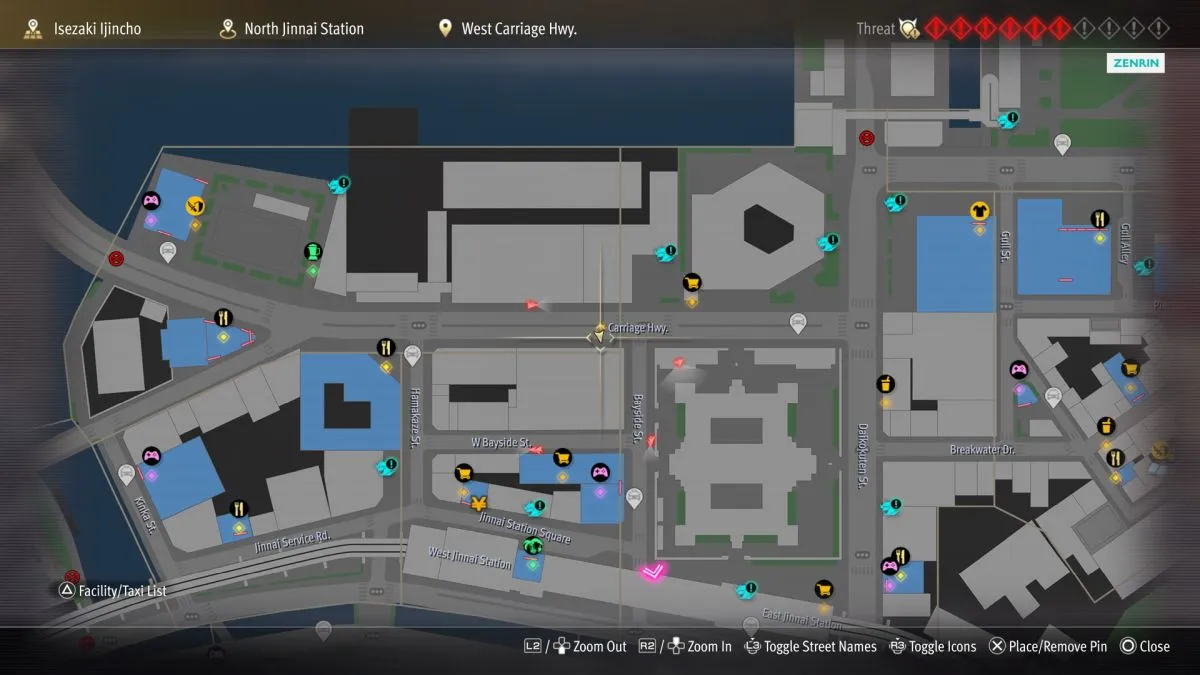
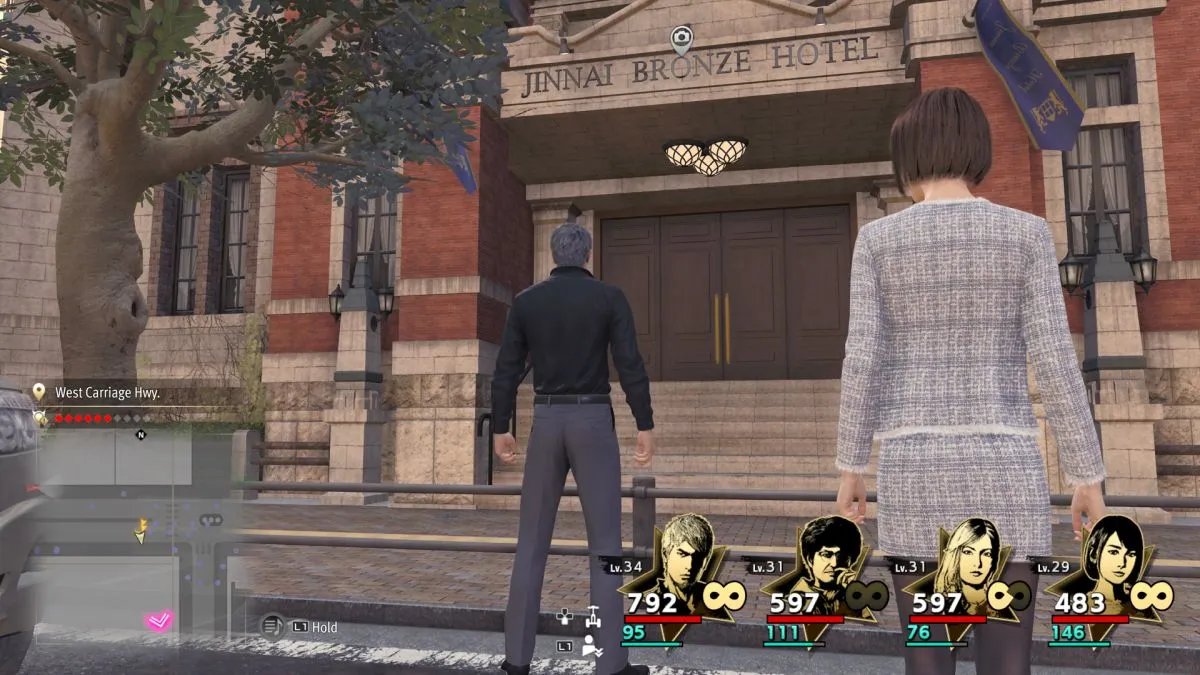
You can snap this photo while standing on Carriage Hwy. There are two fast travel beacons. Both of them are a similar distance from your destination. I recommend using the Le Nuveau hama beacon and traveling east from there. Watch the buildings to your right (the south side of the road). Snap a photo as you reach the end of the massive building made of red brick. The entrance is just ahead of the intersection with Bayside St.
9. m HOLD’EM (Jinnai)
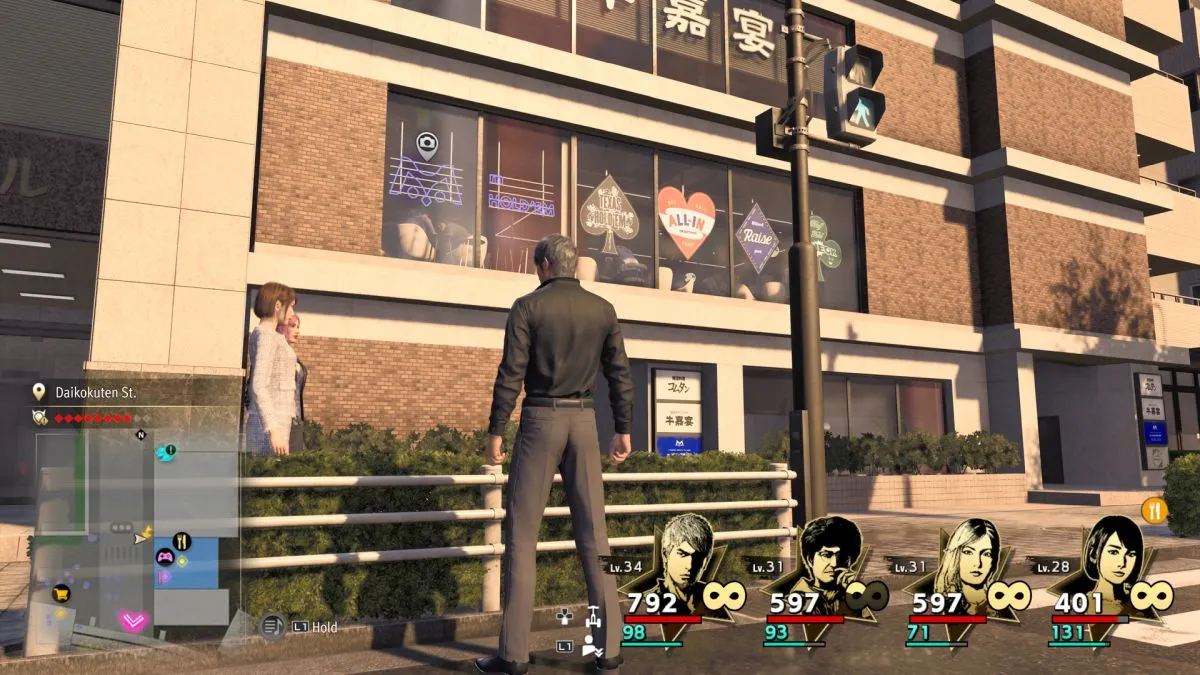
You will find m HOLD’EM just northeast of East Jinnai Station, on the east side of Daikokuten St. If you like, take the Jinnai Station fast travel beach and head east. Then start north while keeping an eye on the buildings to the east. Take a picture of the leftmost display window on the second story of the building’s exterior.
10. Cut House Timeline
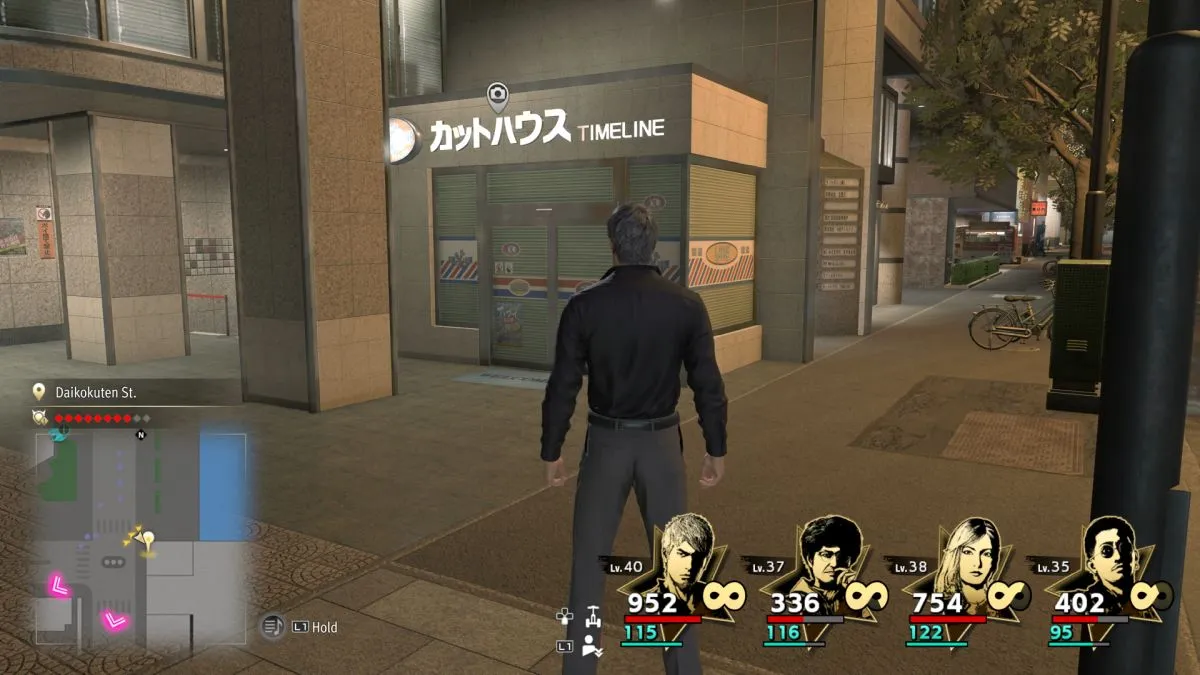
This is the last Photo Rally location I found, and I needed a colleague’s help to do so. There are two buildings that look essentially the same. One of them works for the photo. The other one does not. The location you want is on the corner of the building where Carriage Hwy. and Daikokuten St. meet. It’s a short distance east from the East Carriage Hwy. fast travel beacon.
11. Hamakita Park Fountain
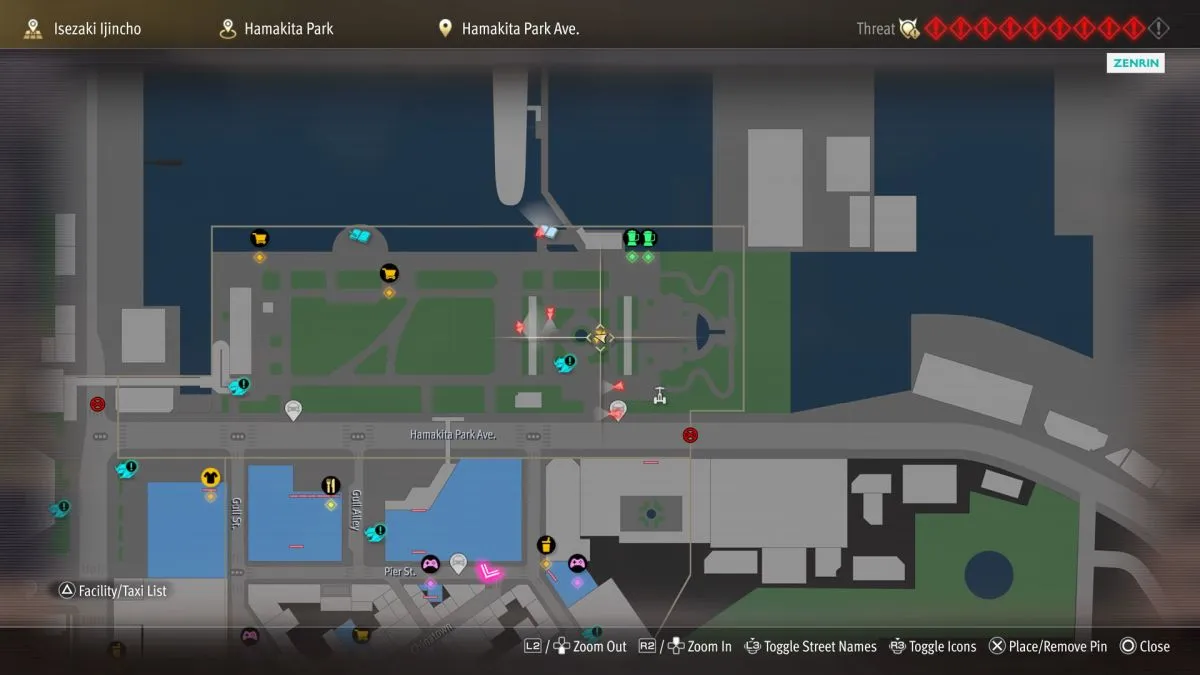
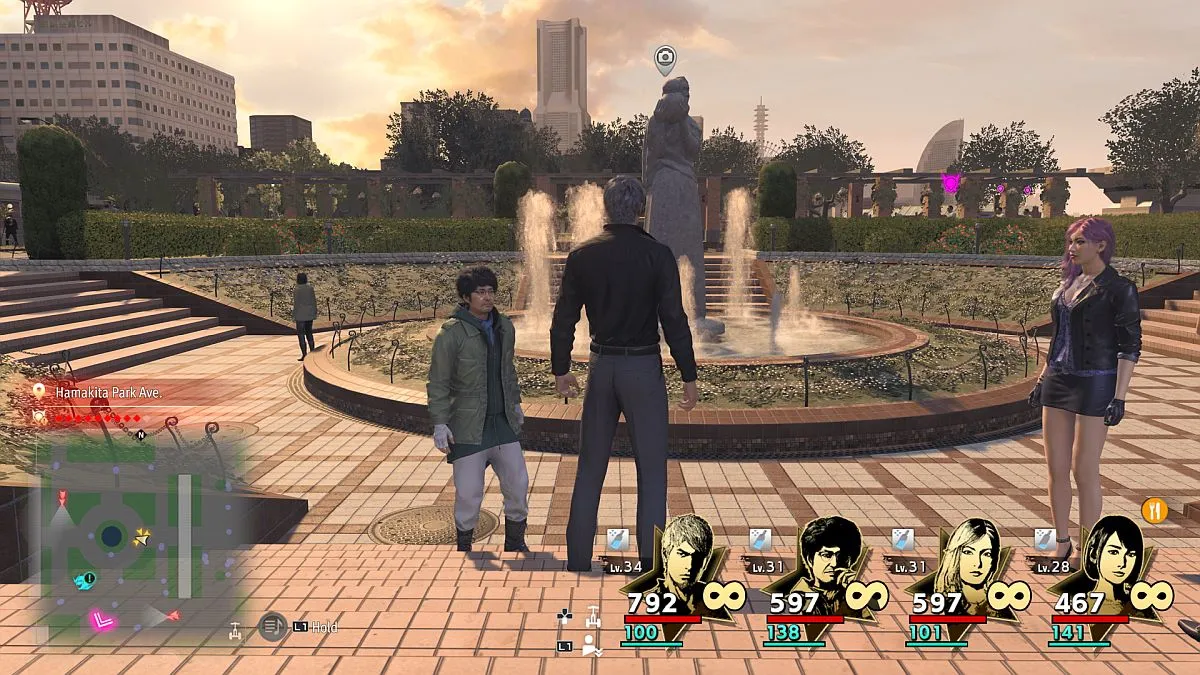
Hamakita Park is a large area along the map’s north side. Look for its fountain in the eastern half. I recommend that you fast travel to the E Hamakita Park beacon. Then you simply need to head a short distance to the northwest to find the plaza and fountain. Take a picture of the water geysers.
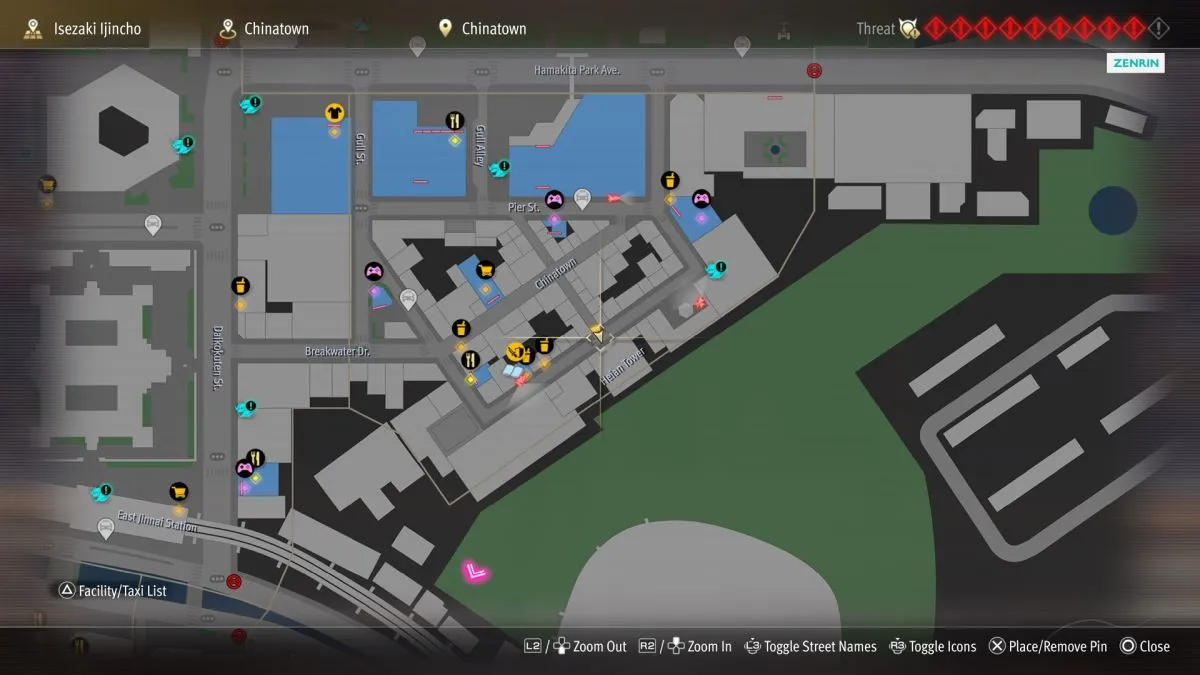
12. Swine La Tang
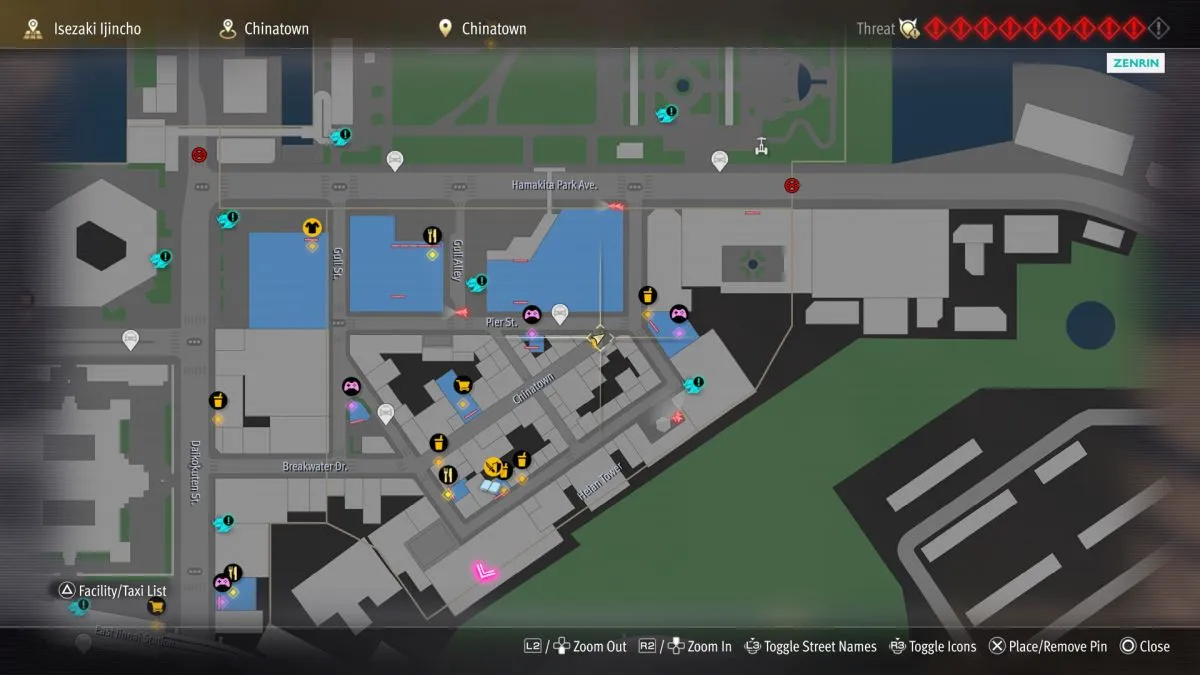
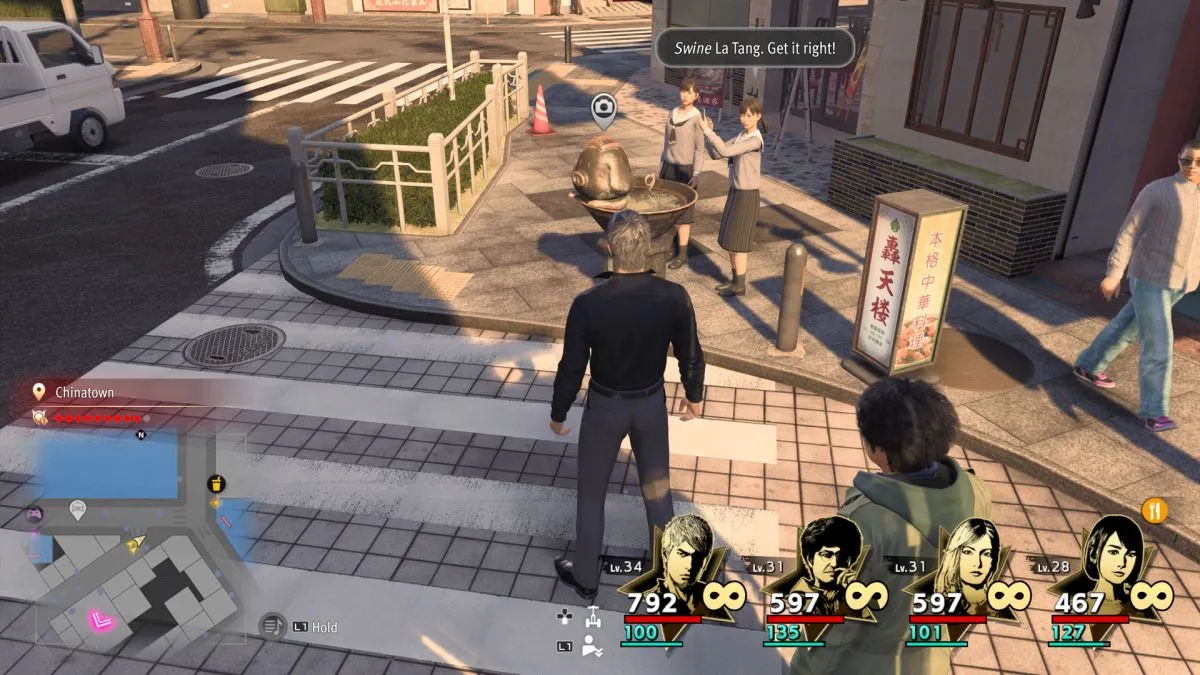
The object of interest waits near the northeast side of Chinatown. You can use the N Chinatown fast travel beacon. From there, head a short distance east. Watch for a pig-shaped fountain and shrubbery. It’s right near the east end of Pier St.
13. Chinese Pavilion
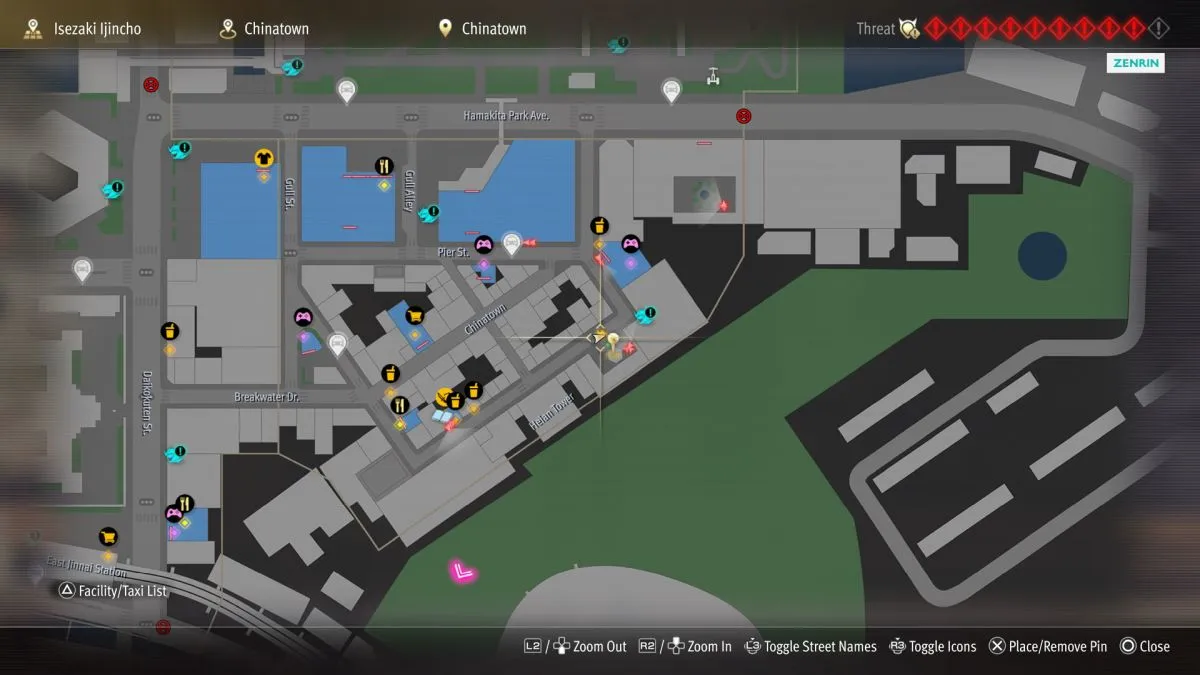
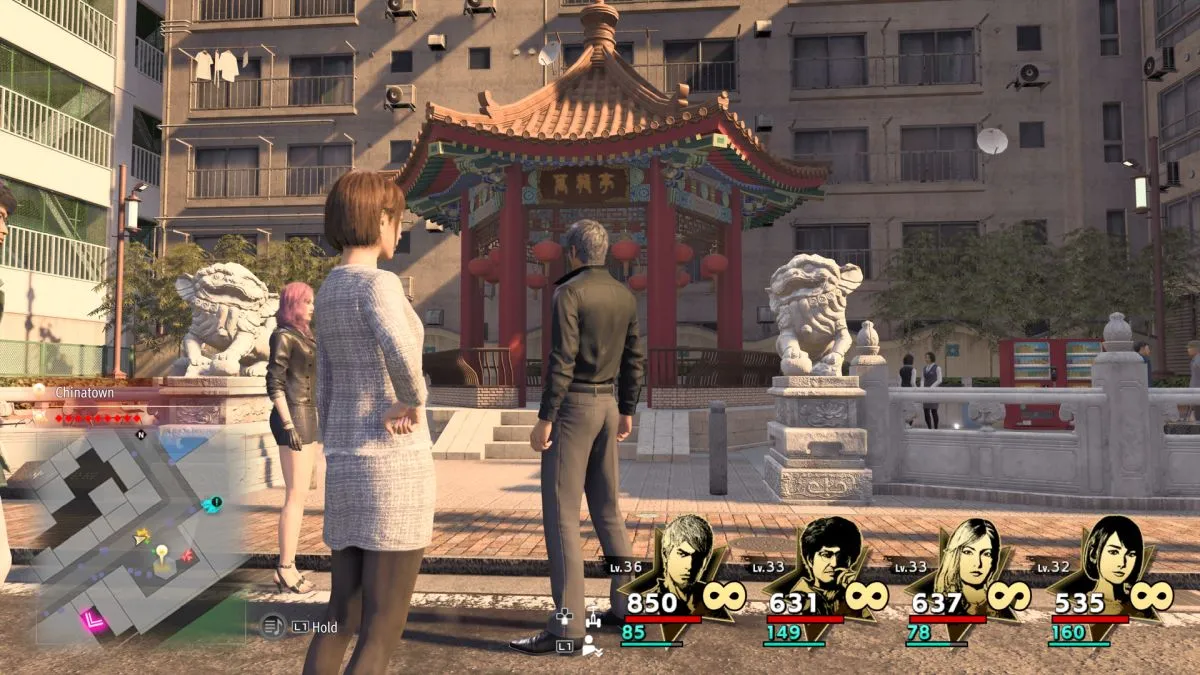
The easiest way to reach this location is to fast travel to the N Chinatown beacon and then head east on Pier St. When you must head left or right, follow the street east. Continue along that street as it wraps to the right at another corner. Now, watch toward your left. There is a courtyard area here, with the pavilion in plain view. Photograph the structure carefully. You need to get pretty close to a dangerous enemy mob in order to snap a satisfactory photo.
14. Heian Tower
A street cuts through the center of Chinatown. It leads from Pier St. toward the southeast. Heian Tower waits at its end, a short distance east from the Ultimate Pork Bun. Stand outside the tower and snap a photo of the front sign hanging from its entry arch.
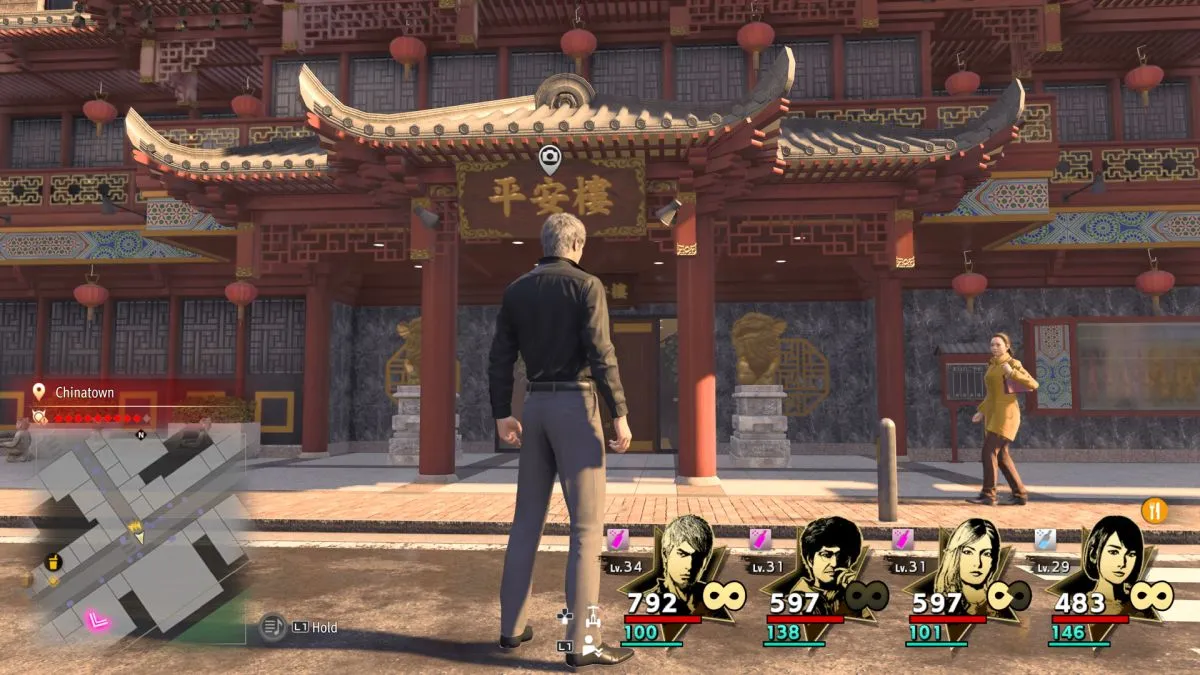
15. Zenshomon
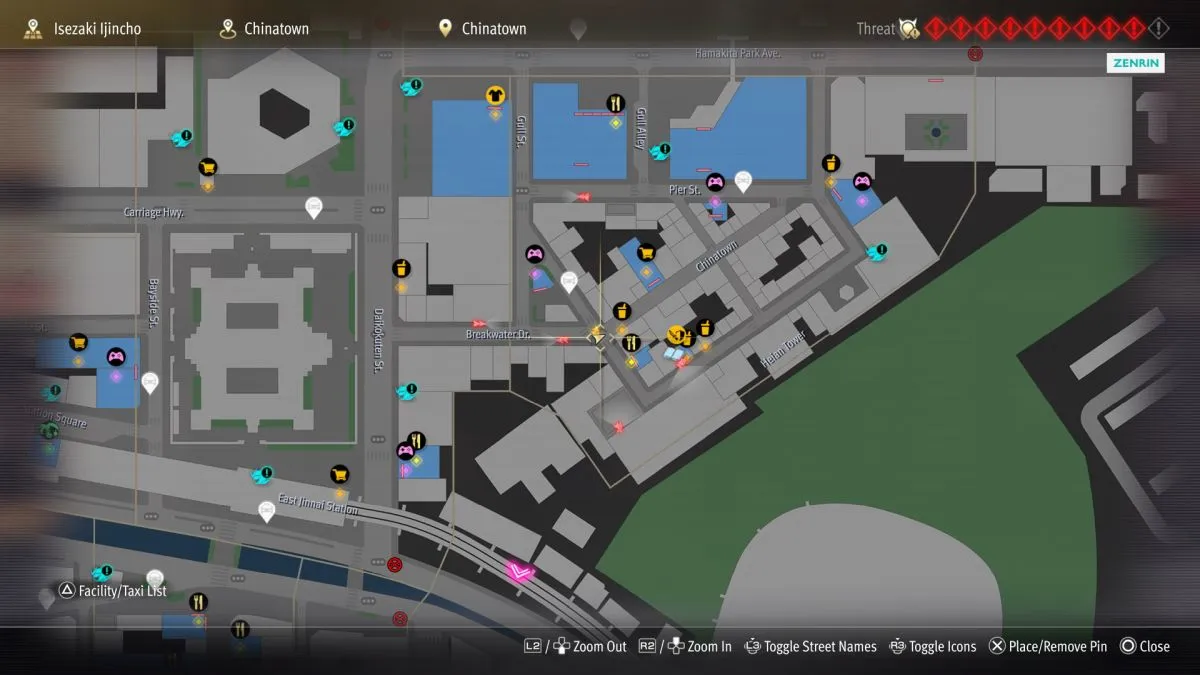
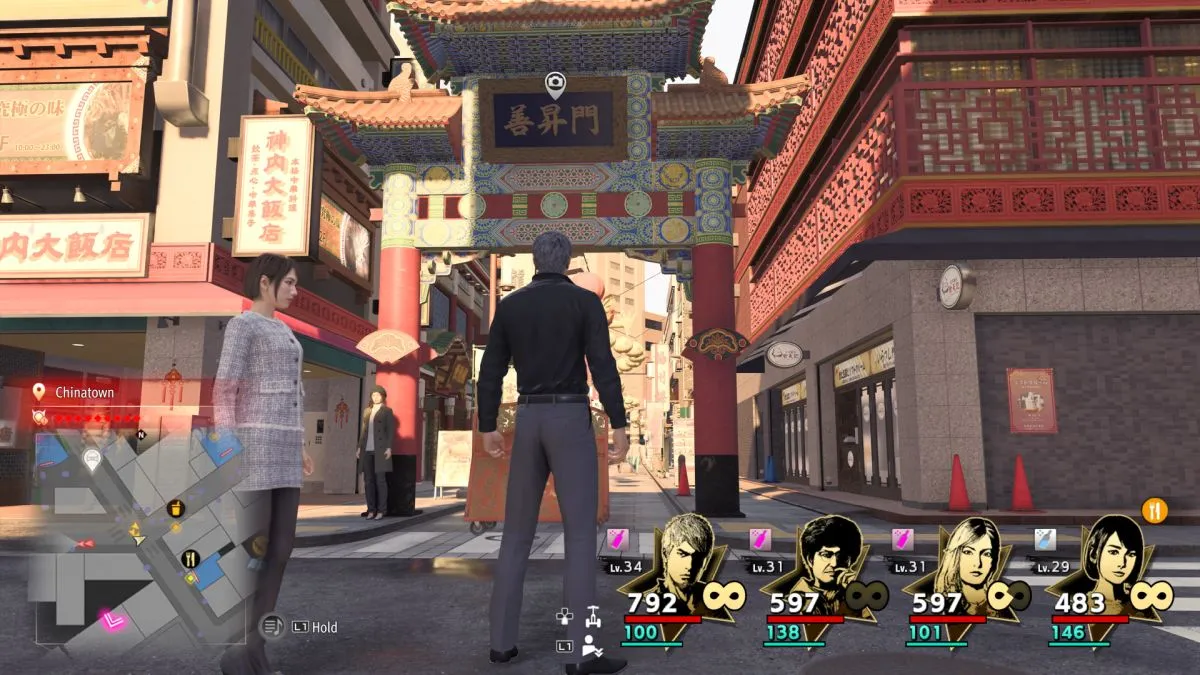
Check along the east end of Breakwater Dr., along the Chinatown district’s far west side. It’s a short distance southeast from the S Chinatown fast travel beacon. Your target is the big archway at the entrance to the district. You must look fairly high to spot the part you need to photograph.
When you snap all of the required photos and show off your results at the local branch of Alo-Happy Tours, you receive the Pancake Maker. You might imagine that means the final Photo Rally prize falls flat, but it’s actually a useful weapon.
- SEO Powered Content & PR Distribution. Get Amplified Today.
- PlatoData.Network Vertical Generative Ai. Empower Yourself. Access Here.
- PlatoAiStream. Web3 Intelligence. Knowledge Amplified. Access Here.
- PlatoESG. Carbon, CleanTech, Energy, Environment, Solar, Waste Management. Access Here.
- PlatoHealth. Biotech and Clinical Trials Intelligence. Access Here.
- Source: https://www.pcinvasion.com/all-uptown-photo-rally-locations-in-like-a-dragon-infinite-wealth/
- :is
- :not
- :where
- 1
- 15%
- a
- access
- accessed
- accessible
- across
- activate
- actually
- Additional
- After
- ahead
- All
- along
- also
- an
- and
- Another
- any
- ARE
- AREA
- AS
- At
- back
- base
- BE
- Beach
- beacon
- before
- below
- Big
- Bit
- both
- Branch
- Building
- business
- but
- Campaign
- CAN
- Can Get
- car
- carefully
- Center
- characters
- chinese
- Close
- Column
- comes
- complete
- Completed
- continue
- continues
- Corner
- Cut
- cuts
- Dangerous
- destination
- directions
- directly
- Display
- distance
- district
- do
- document
- does
- Door
- down
- dr
- Dragon
- each
- Early
- earn
- easiest
- easily
- East
- eastern
- Edge
- end
- enemies
- Enter
- entrance
- entry
- essentially
- establishment
- Even
- events
- Every
- Exploring
- eye
- Falls
- far
- FAST
- fast travel
- few
- final
- Find
- First
- flat
- follow
- For
- found
- fountain
- from
- front
- Gates
- get
- Go
- golf
- guide
- Half
- hangs
- happy
- Have
- hawaii
- head
- help
- here
- High
- Highway
- hold
- hotel
- House
- However
- http
- HTTPS
- i
- if
- imagine
- in
- Including
- inside
- interest
- intersection
- invasion
- involved
- IT
- ITS
- jpg
- just
- Keep
- keeping
- large
- Last
- Leads
- left
- like
- Listed
- listing
- local
- located
- location
- locations
- Long
- Look
- made
- Main
- make
- map
- May..
- means
- Meet
- Meets
- might
- most
- motorcycles
- must
- Near
- Need
- needed
- North
- noteworthy
- now
- object
- of
- off
- on
- once
- ONE
- or
- order
- Other
- our
- outside
- over
- Park
- part
- PC
- PC Invasion
- photo
- Photos
- picture
- Pictures
- Plain
- plato
- Plato Data Intelligence
- PlatoData
- plus
- Pork
- presented
- pretty
- prize
- provide
- rally
- reach
- receive
- recommend
- Red
- required
- residential
- restaurant
- Results
- return
- Rewards
- Ride
- right
- road
- Room
- s
- same
- School
- screenshots
- see
- separate
- service
- Shark
- Short
- should
- show
- showing
- side
- sign
- similar
- simply
- Snap
- So
- South
- southeast
- Southern
- Spot
- stand
- standing
- Stars
- start
- station
- Steps
- street
- structure
- sure
- Take
- taken
- tang
- Target
- that
- The
- The Area
- The West
- Them
- then
- There.
- they
- this
- Through
- timeline
- to
- Tour
- tours
- toward
- Tower
- travel
- Traveling
- true
- TURN
- two
- use
- used
- useful
- using
- various
- vehicle
- very
- View
- Visit
- waits
- want
- warning
- Watch
- Way..
- ways
- Wealth
- West
- Western
- when
- whenever
- while
- will
- with
- within
- Word
- Work
- works
- written
- you
- Your
- zephyrnet